Barrier Blast Particles
Barrier Blast has a lot of particle effects. For simple particle effects, I have a very simple particle system I use. The gem shards, fireball particles, and slime droplets all use this system. For more complex effects, I ususally just implement the particles as part of the draw code. The magic effects and explosions are implemented in the draw code of related objects.
Force field effect
First, some variables will control where the force field will be drawn on screen, and the radius of the barrier's circle.
Then we make a list which will hold the coordinates of each particle in the force field. It also holds a frame counter f for each particle. This counter controls the lifetime of the particles. Particles are colored based on their lifetime, and they die and respawn when the counter reaches 64. You can spawn any number of particles here (as long as you can draw them within the CPU limit), and set the lifetime to whatever you like.
function _init()
  ffx = 64
  ffy = 64
  distance=5
  ff = {}
  for i=1,64 do
    ff[i]={f=i,x=0,y=0}
  end
end
For this demo, we move the force field around based on button inputs. In Barrier Blast the force field tracks the player until they fire a missile. When they press the shoot button the distance is reduced to 2 to form a projectile, and ffx and ffy are updated to move the particle separately from the player.
function _update()
  if (btn(0)) ffx-=1.5
  if (btn(1)) ffx+=1.5
  if (btn(2)) ffy-=1.5
  if (btn(3)) ffy+=1.5

  if (btn(4)) distance+=1
  if (btn(5)) distance-=1
  -- _update() continued below
Now we loop over all of the particles and check if the frame counter is over 64. If it is, the particle is "dead" and should be deleted. But instead of deleting the particle object and creating a new one, we just move the particle and reset the counter.
A random angle is chosen, and some trig is used to set the X and Y location in relation to the ffx and ffy positions.
If the particle is alive, we just increment the frame counter. I ended up having it increment 4 at a time, so that the particles last 64 / 4 = 16 frames. I could just increment by 1 here and change the other checks to check for 16 directly, but I got lazy when I was tweaking particle lifetime. It was easier to change it in one place here than to update the lifetime check and the initialization code.
  -- _update() ctd.
  for p in all(ff) do
    if p.f>64 then
      local a=rnd()
      p.x=ffx+4+cos(a)*distance
      p.y=ffy+4+sin(a)*distance
      p.f=0
    else
      p.f+=4
    end
  end
end
This gradient function is super useful. As the counter increases from 0 up to the maximum, the result of this function will be a color chosen from the list. This makes it very easy to tweak your particles' color changes, because you can just update the list passed in to the gradient function.
function gradient(counter, maximum, colors)
  return colors[flr(counter*#colors/maximum)+1]
end
The draw code is simple. The only complex work is handled by the gradient function. Each particle is drawn by setting the pixel at it's location to a color from the gradient. Particles start out white, then fade to light blue, then dark blue. Gradient shows each entry in the list for an equal number of frames, so by putting 12 in the list twice the particle spends more time bright blue.
function _draw()
  cls()
  for p in all(ff) do
    if p.f<64 then
      local c = gradient(p.f,64,{7,12,12,1})
      pset(p.x, p.y, c)
    end
  end
end
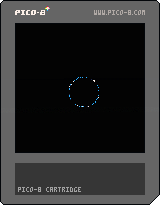
Here's a demo cart showing the force field in action. See the bottom of the page for a downloadable cartridge image you can open in PICO-8.
Simple particle system
There is another particle system I used for many of the simpler particles in the game. First we'll create a list which will hold all active particle objects. In _update, we'll add a call which will update each particle.
function _init()
  particles = {}
end

function _update()
  foreach(particles, update_particle)
end
Before we look at the update_particle function, lets take a look at how particle objects are created and what properties they have. The spawn_particle function has several parameters which control the location and behavior of the particle. x and y are the particle's starting location on screen. After lifetime frames have passed, the particle will be deleted. The lifetime is used as part of the calculation when determining the color of the particle.
colors is a list of color numbers. These colors are passed to the gradient function we used above to determine what color the particle is each frame.
Finally, update_fn is the update function for this particle. It gets called each frame to control the movement of the particle. In my projects I usually end up with 2 or 3 simple movement functions for different types of particles.
The spawn function also gives each particle a randomized starting velocity. It picks a random angle and random power, and uses some math to convert that to an x and y velocity. It also starts frame, the "frame counter" at 0. This counter tracks how many frames the particle has been alive.
function spawn_particle(x ,y , lifetime, colors, update_fn)
  local angle = rnd()
  local velocity = rnd()
  local i = {
    x = x, y = y,
    lifetime = lifetime, colors = colors,
    vx = cos(angle) * velocity,
    vy = sin(angle) * velocity,
    frame = 0, update = update_fn
  }
  add(particles, i)
  return i
end
The update_particle function tracks the lifetime of each particle, so that we don't have to repeat that in each of the different particle updater functions. Then it calls the particle's update function. i:up() is a convenient shortcut in Lua when you have object oriented code. It is the same as typing i.up(i). It looks up the up function saved inside of our particle object, and calls it. It passes the particle itself as the first argument, so that the up function can access that particle's properties. For more info on the : operator, check out the Object-Oriented Programming section in Programming in Lua.
function update_particle(i)
  if i.frame > i.lifetime then
    del(particles, i)
  else
    i:update()
    i.frame += 1
  end
end
Let's take a look now at two different update functions I used in Barrier Blast. pfall is a simple function that adjusts the position based on velocity, and then updates vy to account for gravity. pfire is a bit more complex. It ignores the y component of velocity entirely. Fire particles just float upwards 0.7 pixels per frame. The x position is a blend of two components. First we include vx, because this was set randomly and we want to keep a random spread. Then we blend in a sin function, which gives it a wavy effect. Over time, the result of sin(i.f/8) moves back and for between 1 and -1. This causes the particle to move left and right in a wavy pattern.
function pfall(i)
  i.x  += i.vx
  i.y  += i.vy
  i.vy += .5
end

function pfire(i)
  i.x  += i.vx + sin(i.frame / 8)
  i.y  += -0.7
  i.vx *= 0.94
end
Now that we've seen how particles are updated each frame, lets take a look at how they are drawn. We use the gradient function to get the color of the particle. Then we use a circfill to draw the particle. Why circfill? In addition to the code shown so far, I also sometimes manually change a particle's radius property after spawning it. For example, when a slime is killed in Barrier Blast I create particles with a radius between 1 and 3 pixels, so that the particles are big and blobby. If you're only drawing 1 pixel particles, you can use pset here and it will probably be faster.
function _draw()
  foreach(particles, draw_particle)
end

function draw_particle(i)
  local color = gradient(i.frame, i.lifeteme, i.colors)
  local radius = 0.5
  if (i.radius) radius = i.radius
  circfill(i.x, i.y, radius, color)
end
PICO-8 Demo Cartridges
All code on this page is free to use in your own projects.